TASK 25 //
UNDERSTANDING EDITING SOFTWARE
How To Import Files


To import video and audio files into Final Cut Pro X, move the mouse towards the top left corner of the screen where the ‘File’ option is visible. Once clicked, a list of options will be dropped down. Move the mouse over the ‘Import’ option and choose to import either individual file or a whole folder of files. Once selected, a separate window will be opened and will show you the files, which you are able to import. Click the desired files and then click ‘Choose’ when finished.
How To Insert Files Into Your Timeline

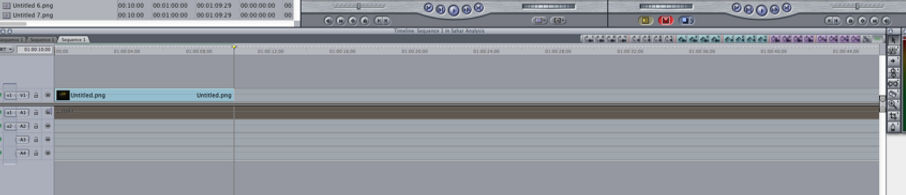
Once they have been imported into the software, there will be a list of files available to insert into the timeline. To insert them to the timeline, drag the one needed onto the timeline at the bottom of the screen. When inserting another clip to the timeline, ensure that there is no space between the two clips, as this will allow a very quick cut to be made.
How To Render Video and Audio Clips

Highlight the clips that need to be rendered in the sequence of the project. In the top left corner of the screen, there is a ‘Sequence’ option on the Toolbar. Once selected, scroll down to ‘Render Only’ and another set of options will become visible. Hover over the ‘Needs Render’ option and click.

How To Colour Correct Clips


To colour correct clips in the sequence of a project, you should highlight/click on the clip that you wish to edit. After this, click the ‘Effect’ tab at the top left hand of the screen, where you should then scroll down to the ‘Video Filters’ option, then scroll to the ‘Colour Correction’ option and further click on the ‘Colour Corrector 3 Way’. To increase the brightness of either dark, mid or white colours, simply scroll the bar towards the right, under the coloured spectrums displayed on the middle window. To decrease the brightness, scroll it to the left. If the colour has been adjusted at all, the clip will need to be re-rendered. To add specific-coloured tints to the clips, move the circle shown in the middle of the coloured spectrum over the desired coloured tint. The more the circle is dragged outwards from the centre of the circle, the harsher the tint becomes.

How To Adjust Audio In Video Clips

Double click the green bar on the clip you wish to edit the audio on and an audio window will appear in the middle window on screen. Once it has appeared, there are various ways in which audio can be adjusted. To increase the volume of a certain clip, drag the audio bar, which is displayed in pink, upwards. To decrease the volume, drag the audio bar downwards. To only edit a specific part of the file, select the last tool option on the bottom right of the screen. Drag the particular part of the file up or down, in order to manipulate the volume. This will allow the audio to be faded out, opposed to being cut from instantly. This will also allow particular parts of a scene, where volume is too high, to be brought down to the same level.
How To Add Video Transitions


To add transitions between two video clips, right click in between the two clips you would like to insert a video transition between. After this, click on the ‘Effect’ option at the top of the screen. Once a list of options are dropped, hover over ‘Video Transitions’, then click on the desired video transition type and then the actual transition you would like to implement in the files. Once this is complete, you can adjust the time that the transition takes from one file to the other by right clicking on the newly added transition icon. This particular part of the clip will need to be re-rendered.
How To Layer Text Onto Video Clips


To add text on screen on a video clip, click the button with the film reel icon with an ‘A’ on it. Once selected, scroll down to the ‘Text’ option, where you should again select the ‘Text’ option. Once this has been selected, the middle window will automatically be adjusted to focus on the text’s settings. At the top of the window, click on the ‘Control’s window, where more settings of the text become visible. Add your own custom text by entering it into the ‘Text’ box displayed towards the top of the window. You can also adjust the font and size of the text. Once you have finalised the settings of the text, click on ‘Video’ option at the top of the window and drag the text from the window to the timeline and insert the text where it is desired. After it has been inserted, you can adjust where the text appears on screen by dragging the text on the window which is on the right of the screen.